
Assisted Dressing Explained: A Caregiver's Practical Guide
- T. Armstrong

- Aug 9
- 11 min read
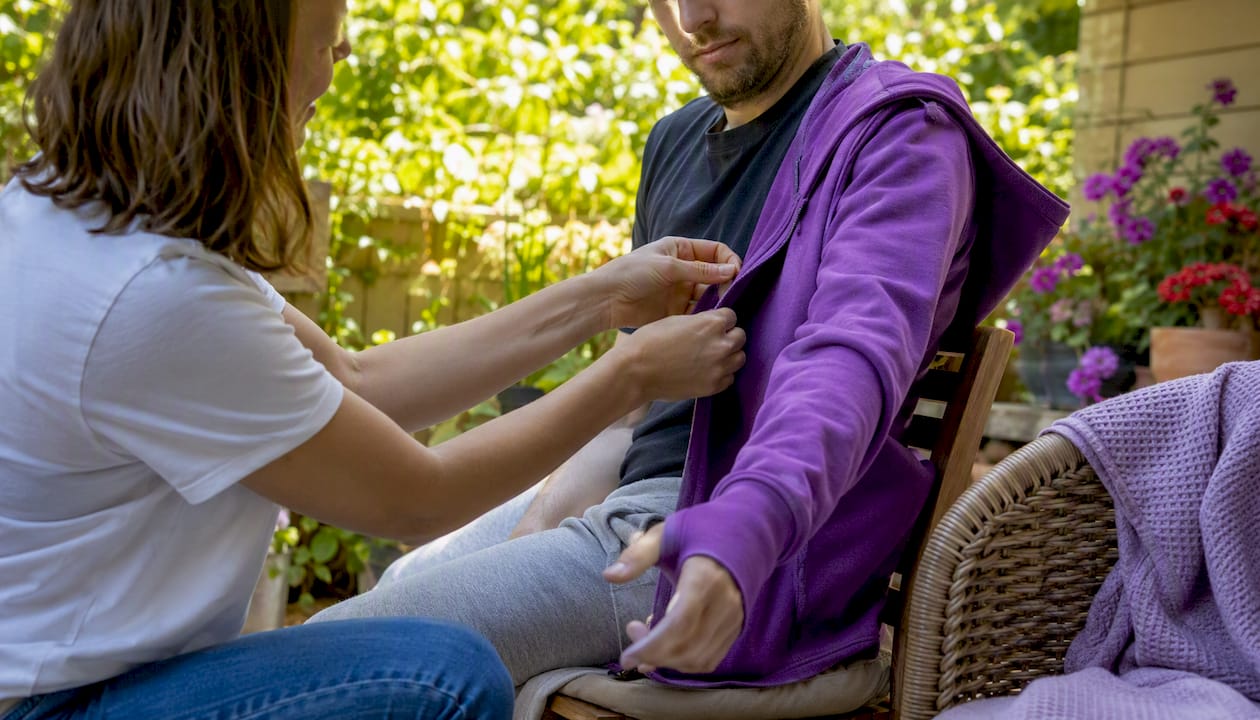
Assisted dressing is when a caregiver helps someone put on or remove clothing because the person cannot safely or fully do it alone. The goal is straightforward: keep the person safe, protect their dignity, and preserve as much of their independence as possible throughout the process.
Whether you’re supporting a parent after a stroke, a partner recovering from a fracture, or a loved one managing Parkinson’s, knowing how to help with dressing correctly makes a real difference. It reduces fall risk, prevents skin injury, and turns a potentially frustrating moment into a calm, respectful routine.
Key Takeaways
Assisted dressing, done well, protects safety, preserves dignity, and keeps the person as independent as possible throughout recovery.
Point | Details |
Dress the affected side first | Guide the weaker limb into clothing first; reverse the order when undressing. |
Use adaptive features early | Magnetic closures, side zips, and elastic waists reduce effort and fall risk during dressing. |
Involve the person in every step | Letting someone choose their outfit or complete one step independently protects their confidence and function. |
Call an OT when dressing becomes unsafe | Rapid decline, repeated near-falls, or skin breakdown are clear signs a clinical evaluation is needed. |
Fracture-club recovery wear | Adaptive pants and sweatshirts designed for casts and braces make caregiver-assisted dressing faster and safer. |
Table of Contents
What does assisted dressing mean in everyday care?
Clinicians classify dressing as an Activity of Daily Living (ADL), a term used in the World Health Organization’s International Classification of Functioning, Disability and Health (ICF) framework to describe the basic self-care tasks people perform every day. When someone’s ability to dress independently is compromised, it shows up in their ADL score and signals a need for support.
Assistance levels aren’t all-or-nothing. Occupational therapists (OTs) typically describe a spectrum:
Independent: The person dresses without any help or prompting.
Supervision: A caregiver watches and stands by in case of difficulty.
Minimal assistance: The person does most of the task; the caregiver assists with specific steps.
Moderate assistance: The person does a moderate portion of the task.
Maximal assistance: The person does less than half of the task; the caregiver does most of the work.
Dependent: The caregiver performs the entire task.
Knowing where someone falls on this scale helps you avoid doing too much. Over-assisting can actually slow recovery and chip away at confidence.
Pro Tip: Before each dressing session, ask yourself what the person can still do on their own. Even if they can only manage one button or pull up one sock, let them. Preserving that small action protects both their physical function and their sense of self.
How does assisted dressing differ from self-dressing?
Self-dressing means the person completes the task independently, even if they use adaptive tools or take longer than usual. Assisted dressing means a caregiver steps in for part or all of the process.
The practical difference shows up in small moments. Someone who can button a shirt with a button hook is self-dressing. Someone who needs you to hold the shirt open, guide their arm through the sleeve, and fasten the buttons is receiving assisted dressing. Both outcomes look the same from the outside, but the path matters enormously for the person’s confidence and long-term function.
Knowing when to push toward more independence is just as important as knowing when to help. If someone is recovering from an injury and their strength is returning, gradually reduce your involvement. Let them attempt each step first, and step in only when they signal difficulty or when safety is at risk. Dressing after an injury often follows a clear progression from dependent to minimal assistance over weeks.
Who commonly needs assisted dressing?
Many conditions affect a person’s ability to dress independently. Recognizing the signs early helps you plan the right level of support.
Common diagnoses that lead to assisted dressing needs:
Stroke or hemiparesis (one-sided weakness or paralysis)
Arthritis (reduced grip strength and joint pain)
Fractures, casts, or post-surgical bracing
Parkinson’s disease (tremor, rigidity, slow movement)
Advanced dementia or cognitive decline
General frailty or deconditioning in older adults
Post-operative recovery (hip replacement, shoulder surgery)
Functional red flags to watch for at home:
Limited range of motion in shoulders, hips, or hands
Poor balance when standing to pull on pants
Impaired fine motor control (struggling with buttons, zippers, laces)
Fatigue that worsens partway through getting dressed
Pain that causes the person to avoid or rush dressing
Confusion about the sequence of putting on garments
If you notice two or more of these signs consistently, the person likely needs at least minimal assistance and possibly an OT evaluation.
What are the real goals of assisted dressing?
The primary goal is safety. Falls during dressing are a genuine risk, particularly when someone is standing on one leg to pull on pants or reaching overhead with limited shoulder mobility. According to the National Council on Aging, falls are a leading cause of injury in older adults, and clothing and footwear choices directly affect that risk.
Beyond safety, assisted dressing should protect skin integrity (catching pressure sores or rashes early), maintain comfort, and above all, preserve the person’s dignity and sense of control.
Secondary benefits matter too. A consistent, well-organized dressing routine reduces caregiver strain, shortens the time needed each morning, and lowers the emotional stress for both of you. Giving the person a choice between two outfits, even a small one, preserves their identity and reduces the helplessness that can accompany physical dependence.
What adaptive clothing features should you look for?
Adaptive clothing is designed to reduce pain, speed up dressing, and hide functional modifications within familiar-looking garments. The features below are the ones most likely to make a practical difference.
Key adaptive features to look for:
Magnetic closures: Replace buttons entirely; snap shut with one hand and look like standard buttons from the outside.
Velcro fasteners: Easier than buttons for people with limited grip; work well on cuffs and waistbands.
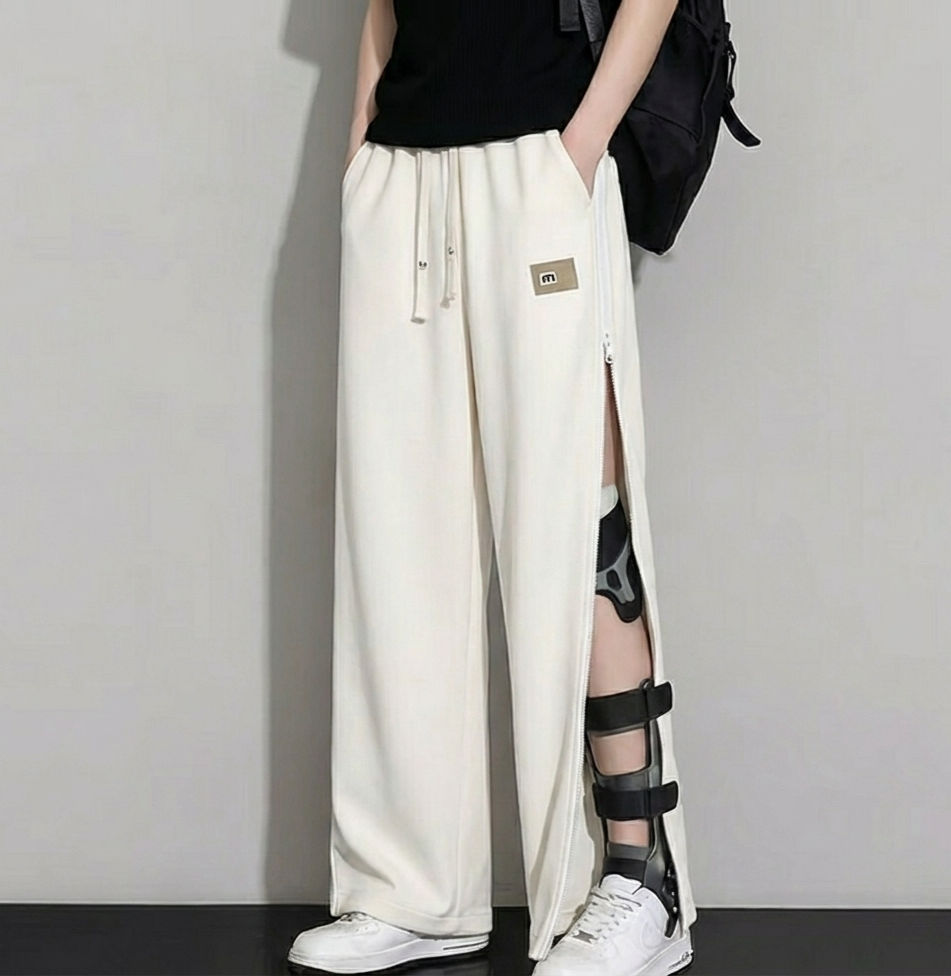
Side zips or side-opening seams: Allow pants or tops to open fully along the side so the garment can be placed around a cast or brace without lifting the limb.
Open-back designs: Tops that fasten at the back are useful for wheelchair users or people who dress lying down.
Elastic waistbands: Eliminate the need to manage a button and zipper at the waist; pull-on pants are faster and safer for seated dressing.
Larger neck openings: Reduce the need to raise arms overhead; helpful after shoulder surgery or with limited shoulder mobility.
Pull-on designs: No fasteners at all; the simplest option when fine motor control is severely limited.
According to the AARP adaptive clothing guide, caregivers should also consider fabrics that are soft, breathable, and easy to launder. Avoid stiff denim or heavy fabrics that are hard to pull on. Look for garments that can go in a standard washing machine and dryer without special handling.
Pro Tip: Before buying, check the retailer’s return policy. Adaptive clothing often needs to be tried on with the specific cast, brace, or mobility aid in place. A generous return window makes it much easier to find the right fit without financial risk.
Feature | Best for | What to check |
Magnetic closures | Limited hand strength or one-handed dressing | Magnet strength; pacemaker contraindication |
Side zip/open seam | Casts, braces, leg injuries | Full opening length; zipper quality |
Elastic waist | Seated dressing, hip surgery recovery | Waistband width; not too tight over incisions |
Open-back top | Wheelchair users, lying-down dressing | Closure type at back; fabric softness |
Pull-on design | Severe fine motor impairment | Stretch percentage; ease of grip at hem |
Which assistive devices make dressing easier?
Devices extend what a person can do without a caregiver’s hands. Home-care training materials/12%3A_Personal_Care/12.05%3A_Unit_D-_Dressing_and_Grooming/12.5.01%3A_Procedure-_Assisting_with_Dressing) consistently recommend these tools as a first step before increasing caregiver involvement.
Sock aid: A plastic or fabric cone that holds the sock open so the person can thread their foot in without bending. Ideal for hip replacements or back pain.
Long-handled shoehorn: Lets someone guide a shoe onto their foot without bending forward. Available in 18–24 inch lengths.
Dressing stick: A rod with a hook at one end; used to pull up pants, push sleeves off shoulders, or hook belt loops. Keeps the person from bending or reaching dangerously.
Button hook: A wire loop on a handle that pulls buttons through buttonholes with minimal grip strength. Widely available for under $10.
Zipper pull: A small ring or loop attached to a zipper tab so it can be grasped with a fist rather than pinched fingers.
Reacher/grabber: A long-handled claw tool for picking up dropped clothing or pulling garments from a shelf without bending.
Most of these devices are available at medical supply stores, pharmacies, and online retailers. Many cost under $20. An OT can recommend the right combination based on the person’s specific limitations, and some devices are covered under Medicare or Medicaid when prescribed.
How do you assist with dressing safely, step by step?
A consistent sequence protects both the person you’re helping and your own body. These steps draw on procedural guidance for home-care assistants and practical family caregiver tips.
Preparation (do this before touching any clothing):
Wash your hands.
Gather all clothing items and lay them out in the order they’ll be put on.
Open all closures, zippers, and fasteners in advance.
Position the person safely: seated on a sturdy chair or the edge of the bed is usually best.
Explain what you’re about to do, even briefly. “I’m going to help you put your shirt on now.”
Dressing sequence:
Dress the affected or weaker side first. Guide the weaker arm or leg into the garment before the stronger side. This reduces strain on the affected limb and makes the sequence smoother.
Bring the garment to the limb rather than pulling the limb toward the garment.
Support the limb gently; never pull on a joint.
Once the affected side is in, assist the stronger side.
Fasten closures, check fit, and confirm the person is comfortable.
Undressing reverses the sequence: remove the stronger side first, then the affected side last.
Pro Tip: For pants, have the person sit throughout if at all possible. Standing to pull up pants is one of the highest-risk moments in a dressing routine. If standing is necessary, make sure they have a stable surface to hold and that you are positioned to support them.
Check skin during dressing. Any redness, blistering, or unusual marks around bony prominences should be noted and reported to a nurse or doctor.
How do you protect safety and dignity during dressing?
The most common mistakes in assisted dressing are rushing, poor body mechanics, and unnecessary exposure. All three are avoidable.
Safety mistakes to avoid:
Rushing through dressing to save time; this is when falls and skin injuries happen.
Bending at the waist to reach low garments; bend at the knees or use a reacher instead.
Pulling on a limb to guide it into clothing; support the joint and move the garment instead.
Leaving the person standing unsupported while you adjust clothing.
Dignity practices that make a real difference:
Close the door and draw curtains before starting.
Cover areas of the body not currently being dressed.
Ask before touching; narrate each step so nothing feels sudden.
Let the person choose between two clothing options whenever possible.
Avoid discussing the person’s condition with others while dressing is in progress.
Red flags that mean you should stop and reassess:
The person expresses pain during a specific movement.
You notice new skin breakdown, swelling, or bruising.
The person becomes distressed, combative, or extremely confused.
You feel you cannot complete the task safely on your own.
When any of these occur, stop, keep the person covered and comfortable, and consult a nurse, OT, or the person’s care team before continuing.
When should you involve an occupational therapist?
An OT referral is worth requesting when the current approach isn’t working safely or when the person’s needs have changed. Rehabilitation literature supports teaching both patients and caregivers adaptive dressing strategies as a standard part of recovery-focused care.
Signs that an OT evaluation is needed:
Dressing takes so long or causes so much pain that the person is skipping it.
You’ve had a near-fall or actual fall during dressing in the past month.
Skin breakdown is occurring around areas covered by clothing or braces.
The person’s condition has changed rapidly (new diagnosis, post-surgery, significant decline).
You’re unsure which adaptive devices or clothing would help most.
The person is being discharged from a hospital or rehab facility and the home setup hasn’t been assessed.
An OT will observe the person dressing, assess their strength and range of motion, and recommend specific adaptive clothing, devices, and techniques. They can also train you directly, which is often more effective than reading instructions alone.
To get a referral, ask the person’s primary care physician. Most insurers, including Medicare, cover OT evaluations when there is a documented functional need. A home OT visit typically lasts 60–90 minutes and results in a written plan you can follow.
Practical adaptive recovery clothing for injury patients
For people recovering from fractures, surgeries, or injuries involving casts and braces, standard adaptive clothing often isn’t enough. Recovery-specific designs solve problems that general adaptive wear doesn’t address, like fitting over a full-leg cast or accommodating a shoulder immobilizer.
What to look for in recovery wear:
Side-opening pants with full-length magnetic or zip closures that open wide enough to fit over a cast or brace without removing it.
Tops with front closures or wide arm openings that don’t require raising the arm above shoulder height.
Soft, stretchy fabrics that don’t press on incision sites or cast edges.
Sizing that accounts for the added bulk of a brace or cast (often one size up from usual).
Machine-washable construction, since recovery periods mean frequent laundering.
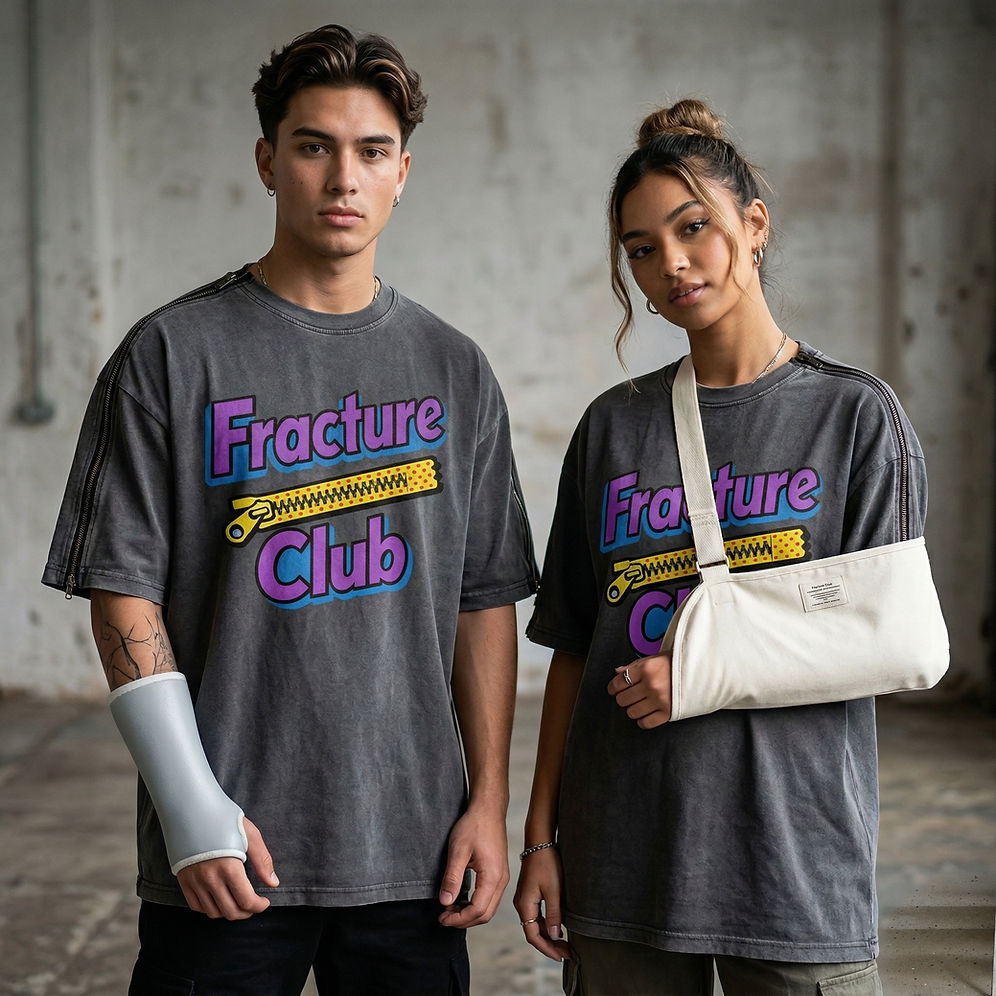
Fracture-club’s adaptive recovery pants with side magnetic zippers are built specifically for this situation: the full-length side opening means you can dress someone with a leg cast while they’re seated, without any lifting or repositioning. Their easy-on/off sweatshirt is designed for upper-limb injuries, with an opening wide enough to accommodate a shoulder brace or arm cast. For more on what makes recovery pants different from standard adaptive wear, the benefits of adaptive recovery pants are worth reading before you shop.
When buying recovery wear, confirm the return policy before ordering. Fit over a cast is hard to predict from a size chart alone, and a no-hassle return process makes the difference between a useful purchase and a frustrating one.
[
](https://fracture-club.com/product-page/fracture-club-magnetic-shoulder-zip-tee-injury-recovery-wear)
What small changes make the biggest difference for caregivers?
[
Here’s something that doesn’t get said enough: the learning curve for assisted dressing is real, and it’s okay if the first few sessions feel awkward. You’re coordinating two bodies, managing clothing, and trying to communicate clearly, all at once. That takes practice.
The caregivers who find their rhythm fastest tend to do three things. They establish a consistent routine at the same time each day, which reduces decision fatigue for both people. They lay out clothing the night before, in the order it goes on, so the morning session starts without scrambling. And they give the person being dressed a genuine choice, even if it’s just “the blue shirt or the gray one?” That small moment of agency matters more than it might seem. It signals that the person is still the one deciding who they are, even when they need help getting dressed.
Adaptive clothing doesn’t have to look clinical or institutional. Modern options hide their functionality well. Magnetic closures look like standard buttons. Side-zip pants look like regular joggers. Choosing garments that reflect the person’s actual style, not just what’s easiest to put on, is one of the most underrated ways to support their emotional wellbeing during recovery.
Recovery wear that works as hard as you do
Getting dressed during recovery shouldn’t feel like a battle. Fracture-club designs recovery wear for exactly the moments this guide describes: the morning after surgery when a standard waistband won’t fit over a brace, the week a cast makes every shirt feel impossible, the day your loved one just wants to feel like themselves again.
[
](fracture-club.com)
The adaptive recovery pants with side magnetic zippers open fully along the side so you can dress someone seated, with a cast in place, in under two minutes. The easy-on/off sweatshirt handles upper-limb injuries with a wide opening that clears most shoulder braces. Both are machine washable, sized to fit over casts, and designed to look like regular clothes. A portion of every purchase supports the Bone Health & Osteoporosis Foundation. Have questions about sizing or fit over a specific cast? Reach out directly and the team will help you find the right option.
Sources
These resources informed this guide and are worth bookmarking for ongoing reference.
The sources below are among the most reliable clinical and consumer-facing references available to U.S. caregivers navigating assisted dressing and adaptive clothing decisions.
This article is general information, not a substitute for advice from a qualified doctor. Consult a qualified healthcare professional about your own circumstances before acting on anything here.
Recommended
Comments