
What to Pack for a Rehab Stay: Clothing Guide
- T. Armstrong

- 6 days ago
- 8 min read
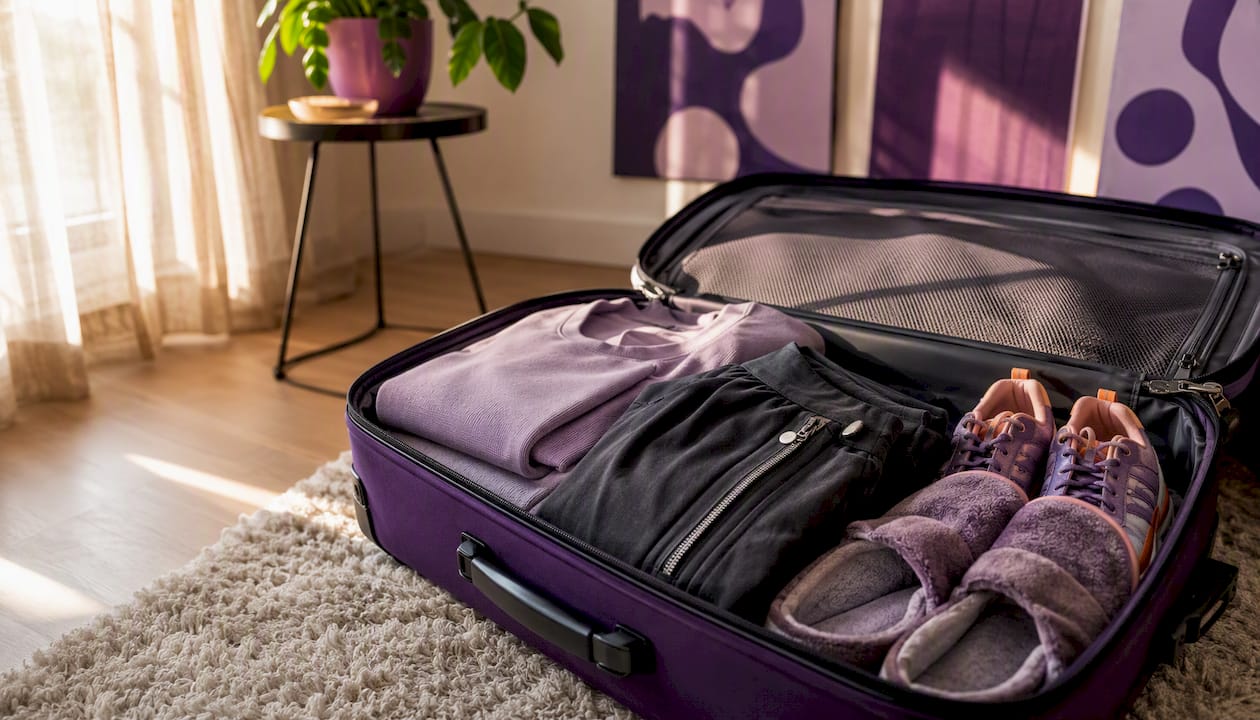
For a rehab stay, pack 5–7 days of comfortable, machine-washable clothing: loose athletic wear, supportive non-skid shoes, modest sleepwear, and labeled basics. That covers most of what you’ll need from day one.
Here’s what to have ready when you arrive:
Photo ID and insurance cards
Medications in original labeled bottles (plus a written list)
1 change of clothes (loose-fitting, easy to put on)
Sturdy, closed-toe athletic shoes with non-skid soles
Toiletries (travel-size, facility-approved)
Comfortable sleepwear
UPMC’s rehabilitation patient checklist and RehabPulse’s complete packing guide both confirm these as the core essentials. Fracture-club’s orthopedic recovery care package checklist adds helpful context for patients coming from surgery or injury. Always call admissions before you leave — every facility has its own rules, and a five-minute call prevents items from being sent home at the door.
Key Takeaways
Packing the right rehab stay clothing means choosing machine-washable, easy-on layers, non-skid footwear, and labeled basics — then confirming facility rules with admissions before you leave.
Point | Details |
Pack 5–7 days of clothing | Machine-washable, loose-fitting basics are enough; laundry is usually available on-site. |
Non-skid footwear is required | Closed-toe athletic shoes with rubber soles are needed for therapy; add slippers and shower sandals. |
Label every item | Write your name on all clothing with a permanent marker before arrival to prevent loss in communal laundry. |
Call admissions first | Confirm electronics, medication, laundry, and restriction policies before you pack. |
Fracture-club adaptive wear | Easy-on/off pants and sweatshirts with magnetic or zip closures are designed for cast and brace use during recovery. |
Table of Contents
What rehab stay clothing should you actually bring?
UPMC’s checklist consistently points to loose-fitting athletic wear as the foundation of a rehab wardrobe. T-shirts, sweatpants, stretch pants, and leggings all work well because they move with your body during therapy and don’t restrict range of motion. Avoid anything tight or structured — your body may be swollen, braced, or simply tired, and comfort matters more than appearance right now.
For your clothing list, plan to bring:
5–7 T-shirts or lightweight tops (breathable, machine-washable cotton or moisture-wicking fabric)
3–5 pairs of sweatpants, stretch pants, or leggings (elastic waists only — no zippers or stiff waistbands)
7+ pairs of underwear and socks (pack more than you think you need)
Pajamas or modest sleepwear (two sets; some facilities require covered shoulders and knees)
A robe or zip-up hoodie for hallway walks and common areas
1–2 light sweaters or hoodies for layering — rehab spaces run cold, especially therapy gyms and corridors
RehabPulse recommends treating clothing as a recovery tool: layers help because facility temperatures are unpredictable, and simple attire keeps your focus on therapy rather than wardrobe logistics. Stick to breathable, machine-washable fabrics and skip anything dry-clean-only.
If the facility has a pool, ask admissions before packing a swimsuit. When one is permitted, a one-piece or modest trunks is the standard.
Pro Tip: Choose elastic waists, front closures, or adaptive garments whenever possible. Getting dressed after surgery or with a brace is harder than it sounds — and the last thing you want is to struggle with a button fly at 6 AM before therapy.
Why your footwear choice matters more than you think
Shoes are not an afterthought in rehab. The right pair keeps you safe during transfers, therapy sessions, and trips to communal bathrooms. The wrong pair can mean a fall.
[
Your primary shoes should be sturdy, closed-toe athletic shoes with rubber non-skid soles. They need to fit securely, support your ankle, and grip the floor. Slip-on styles work if your hand function is limited, but they must have a firm heel counter — not a backless clog or a loose mule. For guidance on safe movement during therapy, proper footwear is consistently listed as a foundational injury-prevention step.
Beyond your main shoes, pack two more:
Slippers with rubber traction soles for room wear and short hallway trips
Shower sandals or flip-flops for communal bathrooms — bare feet on shared shower floors carry real infection risk
Westmoreland Rehab’s inpatient guidance specifically calls out rubber-soled non-slip shoes as required for therapy participation. If you have limited grip strength or hand function, look for shoes with elastic laces or hook-and-loop closures so you can put them on independently.
Falls are the leading cause of injury-related hospital admissions among older adults in the U.S., according to the CDC. Non-skid footwear is one of the simplest, most direct ways to reduce that risk during a rehab stay.
What not to pack for your rehab stay
Facilities enforce clothing restrictions for real reasons: safety, community standards, and therapeutic focus. Knowing what gets turned away at the door saves you from an awkward conversation on admission day.
Addiction Resource’s dress code guide outlines the most common restrictions across U.S. facilities:
No drug or alcohol imagery on any clothing — T-shirts, hats, or accessories
No revealing attire: short shorts, crop tops, low-cut shirts, or anything that exposes underwear
No offensive graphics or language on any item
No drawstrings on hoodies or sweatpants (injury and self-harm risk)
No metal-buckled belts or sharp accessories
No valuables: expensive jewelry, large amounts of cash, or sentimental items that can’t be replaced
Palm Beach Recovery Centers advises leaving valuables at home or sending them with family on admission day. If something gets lost or damaged in a communal setting, the facility is rarely responsible.
The rule of thumb: if you’d hesitate to wear it to a medical appointment, leave it at home.
How many outfits to pack and how laundry works
Most rehab centers recommend packing 5–7 days of machine-washable clothing because closet space is limited and laundry is typically available on-site or through family. That’s enough to rotate comfortably without overpacking.
Here’s a practical packing count:
7 T-shirts or tops
5 pairs of pants or sweatpants
7–10 pairs of underwear (pack extra — these go fast)
7–10 pairs of socks
2 sets of sleepwear
1 robe or zip-up hoodie
2 pairs of shoes (athletic + slippers) plus shower sandals
Texas Health’s packing guidance notes that facilities often provide laundry services or expect family to assist, so a week’s worth of clothes is usually sufficient even for longer stays. Call admissions to confirm the laundry schedule, whether detergent is provided, and whether family can drop off or pick up clothing.
If your discharge date is open-ended, pack light and keep essentials in a carry-on bag. You can always have more brought later.
Label every item with your name using a permanent marker before you arrive. Communal laundry systems mix things up constantly, and an unlabeled hoodie is a lost hoodie.
Questions to ask admissions before you pack
A single call to admissions before departure prevents most packing problems. Here’s what to ask:
Electronics policy: Are phones, tablets, or laptops allowed? Are chargers permitted?
Medication handling: Do you bring meds in original bottles? Does the facility hold them?
Visitor rules: When can family visit, and can they bring additional clothing later?
Laundry: Is it self-service, staff-assisted, or family-managed? Is detergent provided?
Pool or gym access: Is a swimsuit or specific workout gear needed?
Toiletries: Are there restrictions on aerosols, alcohol-based products, or specific brands?
Beyond the call, a few packing habits make arrival smoother:
Keep ID, insurance cards, and medication list in your carry-on, not in checked luggage
Pack meds in original labeled bottles — facilities require this for safe handoff
Bring a small day bag for therapy sessions (water bottle, a light layer, personal items)
Write a clothing inventory list and tuck it in your bag so you and staff can track what’s there
If a caregiver is packing for you, ask them to label everything and keep valuables separate from clothing.
How adaptive clothing makes a rehab stay easier
Getting dressed sounds simple until you’re doing it with a cast, a brace, or limited shoulder mobility. That’s where adaptive clothing earns its place in a rehab wardrobe.
The features that matter most:
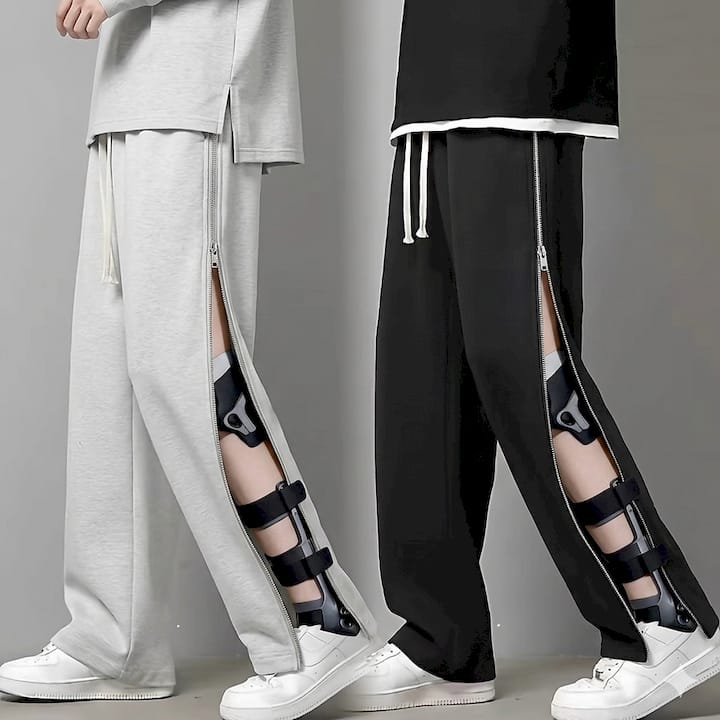
Side zippers or magnetic closures on pants and tops (no need to lift limbs overhead or step through tight openings)
Wide leg or sleeve openings to fit over casts, braces, or compression wraps
Elastic waistbands with no internal drawstring
Front-fastening tops instead of pullovers
Flat seams to avoid pressure points under braces or splints
Shepherd Center’s inpatient packing guidance recommends choosing pants with elastic waistbands and going up one size when needed to accommodate postoperative swelling or bulky braces. That single sizing tip prevents a lot of frustration.
Lighthouse Treatment’s clinical staff note that returning to wearing your own clothing rather than hospital gowns is a meaningful psychological step — it supports dignity and helps patients reestablish normal routines. Adaptive garments let you make that transition without needing help for every button.
[

For choosing recovery pants that work with a cast or brace, look for machine-washable fabric, a relaxed fit through the thigh, and a closure system you can manage one-handed.
[
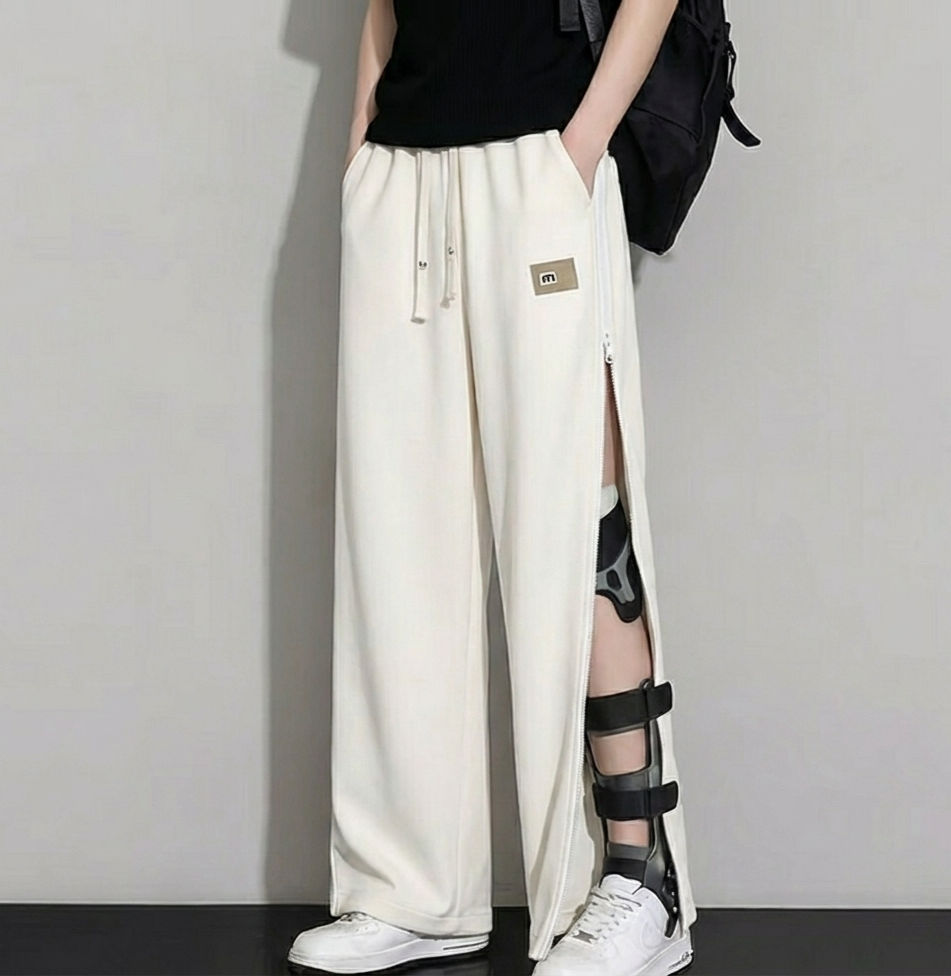
Pro Tip: Label your adaptive garments and set aside the easiest-to-put-on outfit for arrival day. You’ll be tired, possibly in pain, and the last thing you want is to dig through a bag looking for the right pair of pants.
Packing for rehab is simpler than it feels right now
Packing for a rehab stay can feel like one more thing to get right when you’re already managing a lot. Here’s the honest truth: you don’t need to arrive perfectly prepared. Admissions staff have seen every packing scenario, and they’ll help you identify what you need immediately.
What actually matters on day one is comfort, safety, and one bag with the essentials. Wear your own clothes from the start. Clinical staff consistently observe that switching out of a hospital gown and back into personal clothing is a real psychological shift — it signals that recovery has begun and that you’re a person, not just a patient.
Prioritize a non-skid shoe, a comfortable outfit you can move in, and your medications. Everything else can follow.
Adaptive recovery clothing built for rehab stays
Packing for rehab is easier when your clothing is designed for it. Fracture-club makes easy-on/off adaptive recovery pants with side magnetic zippers built specifically for cast and brace users — no overhead lifting, no struggling with tight openings, no caregiver needed for every change.
[
](fracture-club.com)
The adaptive recovery sweatshirt follows the same logic for upper-body injuries: front-opening design, wide sleeve openings, and machine-washable fabric that holds up through communal laundry cycles. Both pieces are worth packing before a planned surgery or a longer rehab admission.
A portion of every Fracture-club purchase goes to the Bone Health & Osteoporosis Foundation. If you have questions about sizing or adaptive options, reach out through the Fracture-club inquiry page before your admission date.
Sources
These resources are worth bookmarking as you prepare. Use them as a reference, then call your specific facility to confirm their current policies.
Call admissions directly to confirm your facility’s current rules. These links are a starting point, not a substitute for that conversation.
Recommended
Comments