
Dressing One Handed in Seconds With OT Steps and Adaptive Clothing

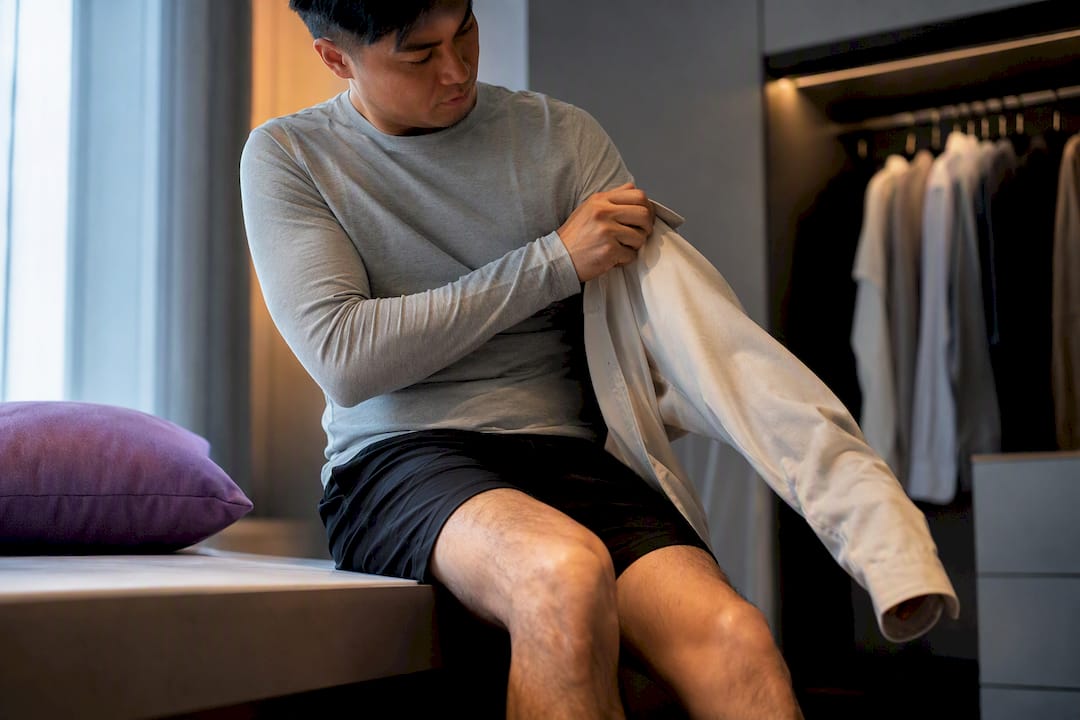
When dressing one handed, the rule that matters most is this: dress the affected or weaker arm first, then let your stronger hand finish the job with fabric and fasteners. Start with easy wins like a front-open shirt, elastic-waist pants, and slip-on shoes. If a shoulder motion causes pain or you’re under specific movement restrictions, check with your occupational therapist before pushing through it.
TL;DR:
Garment choice, such as front-open designs and elastic waistbands, significantly reduces dressing time and difficulty for one-handed individuals.
Using adaptive tools like button hooks, zipper pulls, and sock aids simplifies the dressing process and minimizes fine motor challenges.
Sitting during dressing and supporting the affected arm on a firm surface enhances safety and balance, reducing fall risk.
Clothing modifications, including magnetic closures and elastic loops, offer practical solutions that are reversible and easy to implement.
Specialized adaptive clothing designed for one-handed dressing can cut dressing time from minutes to seconds, especially with side-zip and magnetic fasteners.
Table of Contents
How Do You Put On a T-Shirt With One Hand?
Every single OT handout on one-handed dressing repeats the same sequence, and there’s a reason it’s universal: it works with gravity and your body’s natural range of motion instead of against it. The core rule, confirmed by occupational therapy guidance, is to dress the affected arm first and undress it last.
Seated method (recommended when balance is a concern):
Sit in a stable chair with armrests, if possible.
Lay the shirt on your lap, hem toward your knees, collar farthest from you, and the armhole for your affected arm gaping open.
Slide your affected arm into its sleeve using your strong hand to guide it. Push the sleeve up past the elbow before moving on.
Gather the back of the shirt with your strong hand and lean forward slightly to duck your head through the neck opening.
Push your strong arm through its sleeve last, then straighten the fabric with your strong hand.
Standing variation: Use a dresser or countertop as a bracing point. Rest your affected arm on the surface while you work the sleeve up, so you’re not relying on shoulder strength to hold your arm steady mid-air.
To take the shirt off, reverse the order entirely. Pull your strong arm out first, then pull the garment over your head, and slide the sleeve off your affected arm last, letting gravity help rather than tugging.
Two problems come up constantly. If the collar sticks around your head, lean forward and shake gently rather than yanking. If the sleeve twists on your affected arm, don’t force it; back the sleeve down slightly and re-feed it before pushing up again.
Pro Tip: If you have shoulder precautions after surgery, keep the affected elbow close to your body throughout the whole sequence. Reaching overhead or behind your back is usually the first movement a surgeon restricts.
What’s the Easiest Way to Button a Shirt One Handed?
Front-fastening garments look intimidating with one working hand, but the trick is doing the buttons before you’re fully inside the shirt.
Button 2 to 3 of the lower buttons while the shirt is still flat on your lap or a table.
Slide your affected arm through its sleeve first, exactly as you would for a pullover.
Swing the shirt around your back and thread your strong arm through its sleeve.
Finish the remaining buttons using a button hook, a wire loop tool that pulls the button through the hole one handed.
For cuffs, thread a short elastic loop between two buttonholes instead of buttoning; the cuff slides over your hand like a stretch band and looks buttoned once it’s on.
If buttons still fight you after a few tries, converting to Velcro or magnetic closures on a favorite jacket is worth doing, but test the swap on an old shirt first. Magnetic closures can pull loose under heavier fabric, so match the closure strength to the garment weight.
Pro Tip: Shank buttons, the kind with a small stem instead of flat holes, are easier to grip with a button hook than flat buttons. If you’re replacing buttons anyway, size up.
How Do You Put On a Bra With One Hand?
The front-fastening swivel method is the most reliable technique here, and most people pick it up within a few tries.
Fasten the bra at the front, hook by hook, while it’s still facing you.
Slide both arms through the straps, then rotate the entire bra around your body so the clasp lands at the back.
Adjust the straps and cups with your strong hand once it’s in position.
Consider a front-closure bra design from the start; it skips the rotation step entirely and fastens where you can see and reach it.
A sports bra or crop-style top with a wide neck can work as a lower-effort alternative if your affected shoulder can’t tolerate the reaching motion the swivel method requires.
After breast or shoulder surgery, skip any bra that requires overhead reaching or behind-the-back clasping until your surgeon clears that movement.
How Do You Get Dressed From the Waist Down With One Hand?
Trousers, socks, and shoes each have their own workaround, and the sequence you use for pants sets up everything else.
Sit down. Cross your affected leg over your strong knee, or use your strong hand to lift the affected leg into the pant leg opening.
Pull the pant leg up to the knee, then repeat with your strong leg.
Stand, using a wall or dresser for balance, and pull both sides of the waistband up together.
For socks, cross the target leg over the opposite knee so you can reach the foot without bending fully forward, or use a rigid sock aid that lets you slide the sock on without gripping it directly.
Choose slip-on shoes, Velcro straps, or elastic no-tie laces, and use a long-handled shoehorn so you don’t have to bend down to seat your heel.
Elastic waistbands remove the fiddliest step in the whole process. Clinical guidance for one-handed dressing consistently recommends them over button-and-zip trousers for exactly this reason.
Which Adaptive Tools Actually Make a Difference?
A handful of inexpensive tools solve most of the friction points in one-handed dressing, and you don’t need to buy all of them at once to see a difference.
Button hook: A wire loop on a handle. Push the loop through the buttonhole, catch the button, and pull it back through.
Zipper pull: A ring or loop clipped to a zipper tab, giving you something to hook a finger through instead of pinching a tiny metal tab.
Dressing stick: A rod with a hook on one end, used to pull up pants or push a sleeve into position without bending or reaching.
Sock aid: A rigid or flexible sleeve you load a sock onto, then slide your foot in and pull attached straps to seat it.
Garment modifications go a step further. Magnetic buttons and Velcro replace the fine-motor pinch a real button demands, and elastic loops between buttonholes let a cuff stretch on without unbuttoning at all. Larger shank buttons are easier to grip with a hook than small flat ones. Most of these swaps are reversible if you sew rather than glue.
According to rehabilitation guidance from St. Jude, simple low-cost aids like button hooks and zipper pulls often deliver the biggest independence gains before anyone needs to touch a sewing machine. Start with one or two tools, not a full kit, and bring an occupational therapist into the conversation before you alter a garment you actually love.
How Should You Set Up Your Space Before Getting Dressed?
A few seconds of setup prevents most of the fumbling that makes one-handed dressing feel harder than it needs to be.
Sit down. Standing balance takes energy you want to spend on the garment, not on staying upright.
Rest your affected arm on a pillow or the armrest so it isn’t fighting gravity while your strong hand works.
Lay each garment collar-side toward you and front-side up before you start, so you’re not searching for the opening mid-motion.
Keep your button hook, zipper pull, or dressing stick within reach before you begin, not in a drawer across the room.
Garment choice matters just as much as technique. Look for front-open designs, elastic waists, raglan sleeves (which fit looser at the shoulder seam than set-in sleeves), and fabrics with soft drape that won’t bunch. Adaptive clothing designed for post-surgery recovery typically builds in these features from the start rather than asking you to retrofit them.
Pro Tip: Check Velcro tabs for lint buildup every few weeks and test magnetic closures periodically. Both lose grip over time, usually right when you’re in a hurry.
How Can You Help Someone Dress Without Taking Over?
Helping someone dress is a balance between usefulness and respect, and the coaching approach beats the “let me just do it” approach almost every time.
Ask what they can do themselves first, and let them do it, even if it’s slower than doing it for them.
For shirts, hand them the garment already positioned collar-out and affected sleeve open, then step back.
For bras, offer to fasten the clasp after they’ve done the swivel, not before.
For trousers, support balance at the hip or hand rather than pulling the waistband up yourself.
Stop and check in if you notice pain, swelling, or unusual resistance in a joint. That’s a sign to involve their clinician, not to push through.
Respect privacy by asking before you help with underwear or intimate garments, and knock before entering if they’re dressing alone.
For a fuller walkthrough of stepwise assistance, Fracture Club’s guide to assisted dressing covers specific holds and cues that keep the person you’re helping in control of the process.
Fracture Club’s Take on Dressing With Limited Mobility
Adaptive recovery apparel is designed with this dressing sequence in mind. Easy-on/off sweatshirts and side-zip pants with magnetic closures cut out the steps that cause the most frustration: overhead reaching, tight cuffs, and waistbands that need two hands to fasten.
For readers managing a cast, sling, or shoulder immobilizer day to day, a few resources go deeper on specific scenarios:
Dressing With Arm Cast Tips walks through cast-specific sleeve and layering adjustments.
How to Dress Safely With a Shoulder Immobilizer covers movement limits most surgeons set after shoulder procedures.
Fracture Recovery Clothing overview breaks down clothing choices by injury type.
A portion of proceeds supports the Bone Health & Osteoporosis Foundation, and the brand leans on shared recovery stories from its community as much as it does on product design.
How Do You Put On Underwear With One Hand?
Underwear follows the same weaker-side-first logic as pants, but the smaller fabric and tighter waistband make balance more important than usual.
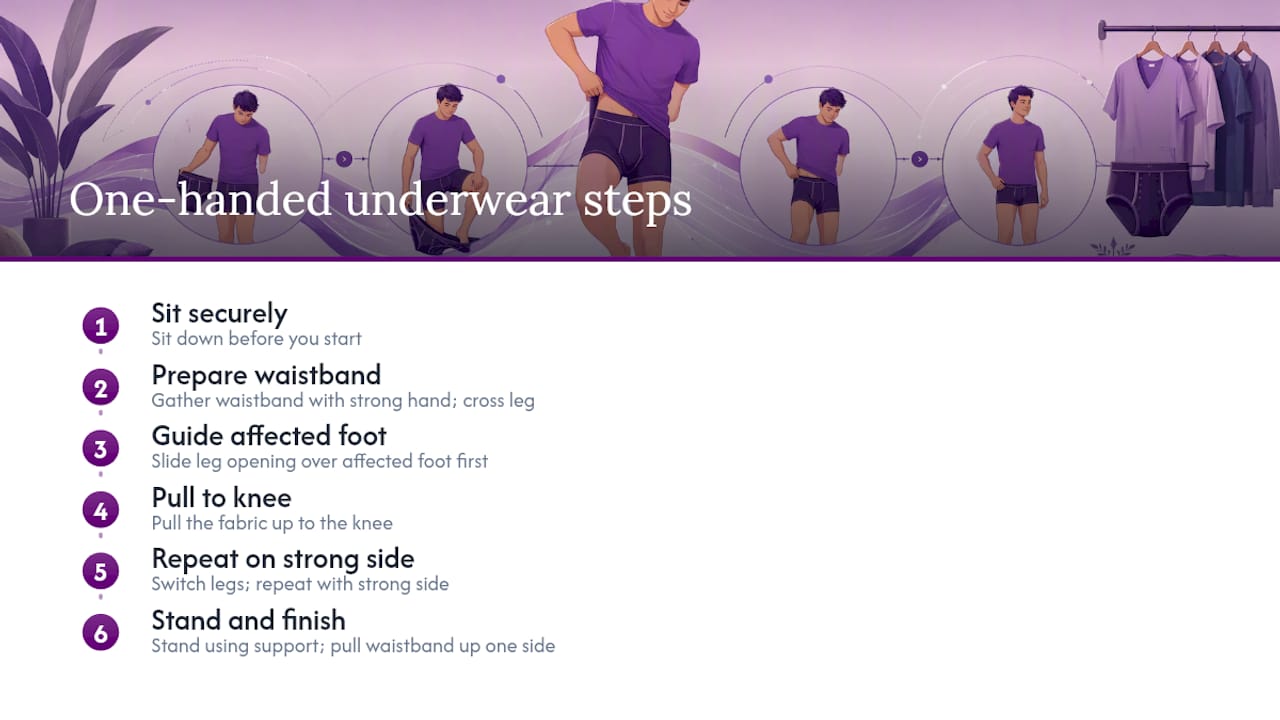
Sit down before you start. Gather the waistband with your strong hand and cross your affected leg over your strong knee, then slide the leg opening over your affected foot first. Pull the fabric up to the knee, switch legs, and repeat with your strong side. Stand, using a wall, bed frame, or grab bar for support, and pull the waistband up the rest of the way with your strong hand, adjusting one side at a time rather than trying to yank both hips into place simultaneously.
Boxer-style underwear with a wide, soft waistband is easier to manage than tight briefs, since you have more fabric to grip and less precision required to seat it correctly. Compression-style underwear, while sometimes recommended after certain surgeries, can be genuinely difficult with one hand because the fabric resists stretching; if your recovery calls for it, plan on extra time or a caregiver’s help during the first couple of weeks.
Removing underwear reverses the sequence: push down from the strong side first, then work the affected leg out last, seated if balance is a concern. If you’re managing swelling or a compression garment, doing this seated on the edge of a bed reduces the risk of losing your balance mid-motion.
How Do You Put On a Coat or Scarf With One Hand?
Outerwear adds bulk and weight to the same core technique, so a few adjustments make the difference between a coat that fights you and one that goes on smoothly.
Lay the coat on a table or the back of a chair, lining side up, with the affected-side sleeve gaping open and accessible. Slide your affected arm in first, exactly as with a shirt, and push the sleeve up past the elbow before you swing the coat around your back. Reach your strong arm behind you to find the second sleeve and push it through, then adjust the shoulders and front closure with your strong hand.
For heavier coats, draping the garment over a chair back before you start means you’re never holding the full weight of it in one hand while trying to locate the second sleeve. A coat with a looser cut through the shoulder, like a raglan-sleeve style, also slides on with less shoulder rotation than a fitted set-in sleeve.
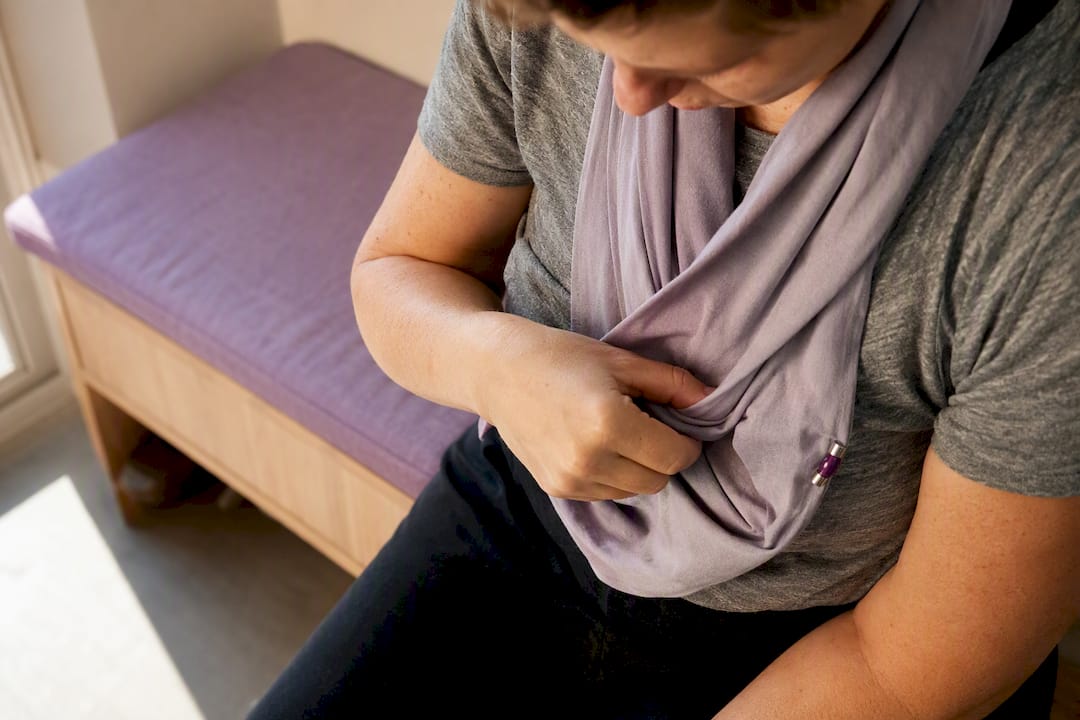
Scarves are easier than they look: drape the scarf around your neck while it’s still flat on a table or your lap, then tie or loop it using your strong hand against your body as a brace, rather than trying to hold both ends in the air. A magnetic scarf clasp, sold in most adaptive-clothing shops, replaces tying altogether and takes seconds to fasten one handed.
How Do You Manage Belts and Laces With One Hand?
Belts and lace-up shoes involve fine motor coordination that button hooks and zipper pulls don’t fully solve, so a slightly different set of adaptations applies here.
For belts, an elastic or Velcro-closure belt removes the buckle-and-loop problem entirely; you thread it once, adjust the fit, and never rebuckle it again, just slip it on and off like a stretchy waistband. If you want to keep a traditional buckle belt, thread it through your pants while the belt is off your body and buckle it at a comfortable notch before putting the pants on, then treat the whole assembly as one unit going forward.
Laces are the harder problem. Elastic no-tie laces, which thread through the existing eyelets and stay permanently tensioned, are the most practical fix for dress shoes or sneakers you’re not ready to replace. If you want to keep functional laces, a one-handed shoelace-tying technique exists (looping the lace around a finger and pulling a bow through with your teeth or against your body), but it takes practice and isn’t reliable under time pressure. For most people managing a single working hand, swapping to Velcro, elastic laces, or slip-on styles saves more frustration than mastering a workaround knot.
How Do You Stay Safe and Balanced While Dressing One Handed?
Balance risk goes up the moment you’re standing on one leg or reaching for a sleeve behind your back, and most dressing-related falls happen during exactly those moments.
Dress seated whenever a step allows it. Pulling on pants, socks, or shoes while sitting removes the single-leg-balance problem completely, and it costs you nothing in speed once the sequence becomes familiar. When you do need to stand, brace against a fixed surface, a wall, a heavy dresser, a grab bar, rather than a chair back or anything on wheels or casters.
Keep your affected arm supported rather than letting it hang or dangle while you work with your strong hand; a dangling arm changes your center of gravity more than people expect, especially right after surgery when swelling adds weight. If you feel light headed, pause and sit back down before continuing. Rushing is the biggest risk factor across every clinical leaflet on this topic, more than any single garment or technique. Give yourself extra time, especially in the first few weeks, and treat a slower dressing routine as normal rather than as a failure.
Why Does Dressing Independence Matter So Much Emotionally?
Getting dressed is one of the first things people do every day, and losing the ability to do it without help can feel disproportionately hard compared to bigger recovery milestones. That’s not an overreaction. Independence in small daily tasks is closely tied to how in-control someone feels overall, and dressing happens to be one of the most visible and repeated tasks there is.
Progress here tends to be nonlinear. You might nail the t-shirt sequence one morning and completely fumble it the next, especially if swelling, fatigue, or pain levels shift day to day. That’s normal, not a setback. Track small wins, the first time you button a cuff alone, the first morning you don’t need help with socks, rather than expecting steady, straight-line improvement.
Practicing during low-stakes moments, on a weekend morning with no appointment to rush to, builds the muscle memory you’ll need on harder days. And it’s worth naming the emotional layer directly: needing help with something as personal as dressing can feel like losing a piece of yourself, even temporarily. That feeling is valid, and it usually fades as independence returns, one sleeve and one button at a time.
The Real Gap Between OT Advice and What People Actually Need
Most one-handed dressing guidance gets the sequence right and the emotional reality wrong. Every clinical leaflet says “dress the affected arm first,” and that rule holds up. What it skips is the part where you’re standing in your bedroom, running late, fighting a shirt that felt simple in the diagram and impossible in your hands.
The overlooked variable isn’t technique. It’s garment design. A person can execute a flawless seated dressing sequence and still lose ten minutes to a stiff button placket or a sleeve cut too narrow for a cast. That’s a clothing problem, not a skill problem, and no amount of practicing the swivel bra method fixes a garment that was never designed for one-handed use in the first place.
Prioritize garment choice that suits disabled needs before you invest heavily in technique drills. Get a few pieces, a front-open top, an elastic waistband, that remove friction points entirely, then layer the OT-style sequences on top. Technique and clothing aren’t competing solutions. They’re supposed to work together, and most advice online treats them as separate topics instead of one system.
— Fracture
Where Can You Find Clothing Built for One-Handed Dressing?
If you’ve tried the techniques above and you’re still fighting your wardrobe more than your recovery, the fastest fix isn’t more practice, it’s different clothes. Adaptive recovery apparel is designed so the dressing sequences in this article take seconds instead of minutes, with side-zip closures and magnetic fasteners that skip the fine-motor steps entirely.
[

](fracture-club.com)
The unisex easy-on/off sweatshirt is built for upper-limb injuries and casts, with an opening designed around exactly the affected-arm-first sequence covered earlier. The side-zip adaptive pants use magnetic zippers along the hip so you skip the step-in, pull-up, balance routine altogether.
If you’re recovering from recent surgery or dealing with persistent dexterity loss, adaptive clothing is worth buying now rather than waiting to see if low-cost aids are enough. If your limitation is temporary and mild, start with a button hook or elastic laces first. For sizing questions or help figuring out what fits your specific injury, reach out through the inquiry services page before you order.
Sources
Recommended
Comments