
Caregiver Checklist for Orthopedic Patients: 10 Essentials


Your most important job on day one is simple: clear a safe path to the bathroom, confirm the medication schedule, and protect the incision. Everything else can wait an hour. This caregiver checklist orthopedic patient care plan covers the first 24 hours at home.
First 24 hours: the one-page checklist
Confirm medication names, doses, and times before the patient walks in the door
Check that the incision dressing is clean, dry, and intact
Place the walker or crutches within arm’s reach of the bed
Post emergency contacts (surgeon, pharmacy, ER) on the fridge
Set up water, snacks, and a fiber-rich meal nearby
Clear a straight, wide path from bed to bathroom
Call the surgeon or 911 immediately if you see: a fever of 100.4°F or higher, sudden shortness of breath or chest pain, or heavy bleeding through the wound dressing. Confirm your surgeon’s specific instructions and the exact time of the first follow-up before you leave the hospital.
Key Takeaways
Effective orthopedic caregiving depends on preparing the home before discharge, tracking medications and incision changes daily, and knowing the exact symptoms that require an urgent call.
Point | Details |
Prep starts before surgery | Arrange transportation, meals, and post-op support two or more weeks ahead of the operation. |
Home safety comes first | Clear paths, add night lights, and fit the bathroom with a raised seat and grab bars before discharge. |
Track meds and incision daily | Use a simple chart for doses and a daily wound check to catch problems early. |
Know the three red flags | Fever over 100.4°F, sudden shortness of breath, or heavy wound bleeding all need immediate medical contact. |
Adaptive clothing reduces strain | Fracture-club’s magnetic-closure pants and sweatshirts simplify dressing for casts and braces without twisting healing joints. |
Table of Contents
Pre-Surgery Caregiver Checklist: What To Arrange Before Discharge
The best orthopedic patient care starts two weeks before the operation, not the day of discharge. Waiting until surgery day to figure out logistics is how caregivers end up scrambling for a shower chair at 9 p.m.
Two-plus weeks out: arrange transportation for surgery day, review current medications with the surgical team, and stock the freezer with easy meals.
One week out: confirm who is staying with the patient for the first 48 to 72 hours, line up pet or childcare coverage, and buy any equipment still missing.
48 to 72 hours before: fill prescriptions in advance, charge phones and medical alert devices, and do a final home safety sweep.
Ask the surgical team directly about expected weight-bearing status, the physical therapy schedule, dressing-change timing, and whether an anticoagulant will be prescribed. If the patient will be alone for the first one to two weeks, ask about arranging a trained caregiver or home health visit before discharge, not after.
Pro Tip: Schedule the first post-op physical therapy session and the first surgeon follow-up while you’re still at the pre-admission clinic. Waiting until after surgery to book these means competing for slots during the exact week the patient needs them most.
For a fuller pre-op timeline, Fracture-club’s guide on essential things to know before surgery walks through additional prep steps.
How Do You Make a Home Safe for an Orthopedic Patient?
Walk every room the patient will use before they get home, not after. A throw rug that seemed harmless for years becomes a genuine fall risk once someone is navigating on crutches or a walker.
Remove throw rugs and tape down loose cords
Install night lights along the path to the bathroom
Widen walking paths so a walker or crutches clear furniture easily
Check that the car door and seat height allow safe entry
Add a non-slip mat, shower chair or tub bench, raised toilet seat, and handheld showerhead in the bathroom
Secure handrails on both sides of any stairs the patient must use
Home safety planning before surgery, including clear mobility paths and secure handrails, is one of the most consistently recommended steps across hospital discharge instructions. If stairs are unavoidable, consider setting up a temporary bedroom on the main floor for the first week or two.
Pro Tip: Do the walk-through with the physical therapist or a home health nurse if you can. They’ll test door widths and turning radius for the walker in ways you might not think to check. Fracture-club’s home modification guide covers room-by-room adjustments in more depth.
How Should Caregivers Manage Medications and Pain After Surgery?
A simple chart prevents most medication errors. List the drug name, dose, exact time, and purpose, then check off each dose as it’s given.
Medication Type | Timing Approach | Caregiver Note |
Prescribed pain medication | Often scheduled, not just as-needed, for the first few days | Ask the surgeon whether early doses should be given on a fixed clock |
Non-opioid pain relievers | May be combined per surgeon’s plan | Never combine without explicit approval |
Stool softener | Started day one, not after symptoms appear | Pair with water and fiber |
Anticoagulant (if prescribed) | Fixed daily timing | Watch for unusual bruising or bleeding |
Uncontrolled pain despite following the schedule is worth a call to the surgeon, not something to just tough out. Constipation is a well-documented side effect of post-surgical opioids, and starting a physician-approved stool softener on day one works far better than waiting for discomfort to build.
Watch for these medication warning signs:
Excessive drowsiness or confusion
Unexpected bruising or bleeding
Rash, swelling, or other signs of an allergic reaction
What Does Daily Incision Care Look Like?
Wash your hands thoroughly before touching the dressing or incision
Remove or inspect the dressing exactly as the surgeon instructed
Look closely at color, odor, and any drainage
Re-cover the incision if your instructions call for it
Log the date, time, and what you observed (a quick photo helps track changes)
Most surgeons keep the original dressing on until the first post-op appointment, typically one to three weeks out, and the incision usually can’t get wet until then either.
Call the surgeon right away if you notice:
Increased redness spreading outward from the incision
Warmth around the wound that wasn’t there before
Cloudy, yellow, or foul-smelling drainage
Fever alongside any of the above
When you call, be ready to describe exactly what you’re seeing and when it started. Pro Tip: Keep a small kit stocked with sterile gauze, medical tape, disposable gloves, and a cast protector bag so sponge baths don’t put the incision at risk.
What Are the Warning Signs of a Blood Clot After Orthopedic Surgery?
Short walks as ordered, ankle pumps while resting, staying hydrated, and taking any prescribed anticoagulant on schedule all help lower clot risk after surgery. Confirm with the care team why the anticoagulant was prescribed, the exact timing, and what bleeding risk to watch for.
Call the surgeon or seek emergency care immediately for:
New pain, swelling, or warmth in one leg (especially the calf)
Sudden shortness of breath or chest pain
These can signal a deep vein thrombosis or pulmonary embolism, and they don’t wait for business hours.
How Do You Safely Help With Transfers, Stairs, Bathing, and Dressing?
Good technique protects both of you. Stand on the patient’s operated side during transfers so you can support the weaker leg or arm directly.
Bed to chair: have the patient scoot to the edge, plant their strong foot, and push up while you brace nearby rather than pulling them
Stairs: the patient generally leads with the strong leg going up and the operated leg going down, with a hand firmly on the rail
Bathing: use a shower chair or tub bench, keep the incision covered per your surgeon’s timeline, and switch to sponge baths if bathing isn’t yet approved
Toileting: a raised toilet seat reduces the bend angle and makes sitting and standing safer
Dressing: start with the operated limb first when putting clothes on, and last when taking them off
Helpful dressing aids include a reacher, sock aide, long-handled sponge, and elastic no-tie laces.
Never twist your own back while assisting a transfer
Keep a wide, stable stance and move your feet instead of pivoting
Pro Tip: Adaptive clothing with side openings or magnetic closures cuts dressing time dramatically and removes the awkward tug-of-war over a cast or brace. Fracture-club’s guide on assisted dressing techniques covers more adaptive tools in detail.
What Equipment Should You Have Ready Before Discharge?
Stock these before the patient walks in the door, not after:
Walker or crutches, ideally a rolling walker with 5-inch wheels for smoother movement
Shower chair or tub bench, plus a folding shower seat for stability during bathing
Raised toilet seat
Long-handled sponge and sock aide
Reusable ice packs for swelling control
Extra pillows for elevating the operated limb
Check with insurance about durable medical equipment coverage before buying anything expensive, and borrow items from friends or a medical equipment loan closet where possible. Test that anything you buy is rated for the patient’s weight and feels stable, not wobbly, on a hard floor. Fracture-club’s care package checklist has additional product ideas worth reviewing before discharge.
What Does a Typical Recovery Day Look Like?
A predictable rhythm reduces stress for both of you. A sample day might run:
Morning medication, incision check, and a light protein-rich breakfast
Prescribed home exercises or stretches
A short walk as approved by the surgical team
Rest period, then lunch
Afternoon PT session or home exercise repeat, plus another incision glance
Evening medication, dinner, and wind-down before bed
Early rehab is demanding. Physical therapy may run up to six days a week in the first two weeks depending on the procedure, so attendance matters as much as effort.
Set phone alarms for medication and exercise times
Keep a simple log of pain levels, range of motion, and PT notes
Watch PT-provided exercise videos together if the patient forgets the sequence
Fracture-club’s daily care schedule guide offers a more detailed template you can adapt.
How Do You Protect Yourself as a Caregiver?
Bad lifting mechanics injure caregivers just as often as patients fall. Protect your own back with these steps:
Stand with feet shoulder-width apart before assisting any transfer
Bend at your hips and knees, not your back
Keep the patient close to your body rather than reaching out
Move your feet to turn instead of twisting your torso
Watch yourself for persistent fatigue, irritability, or letting your own meals and sleep slide. These are early burnout signs, not personal failures.
Swap shifts with another family member when you can
Call a respite care service before you hit a breaking point
If you strain something lifting, stop immediately, assess the pain, and get it checked rather than pushing through
What Should Your Emergency Plan Include?
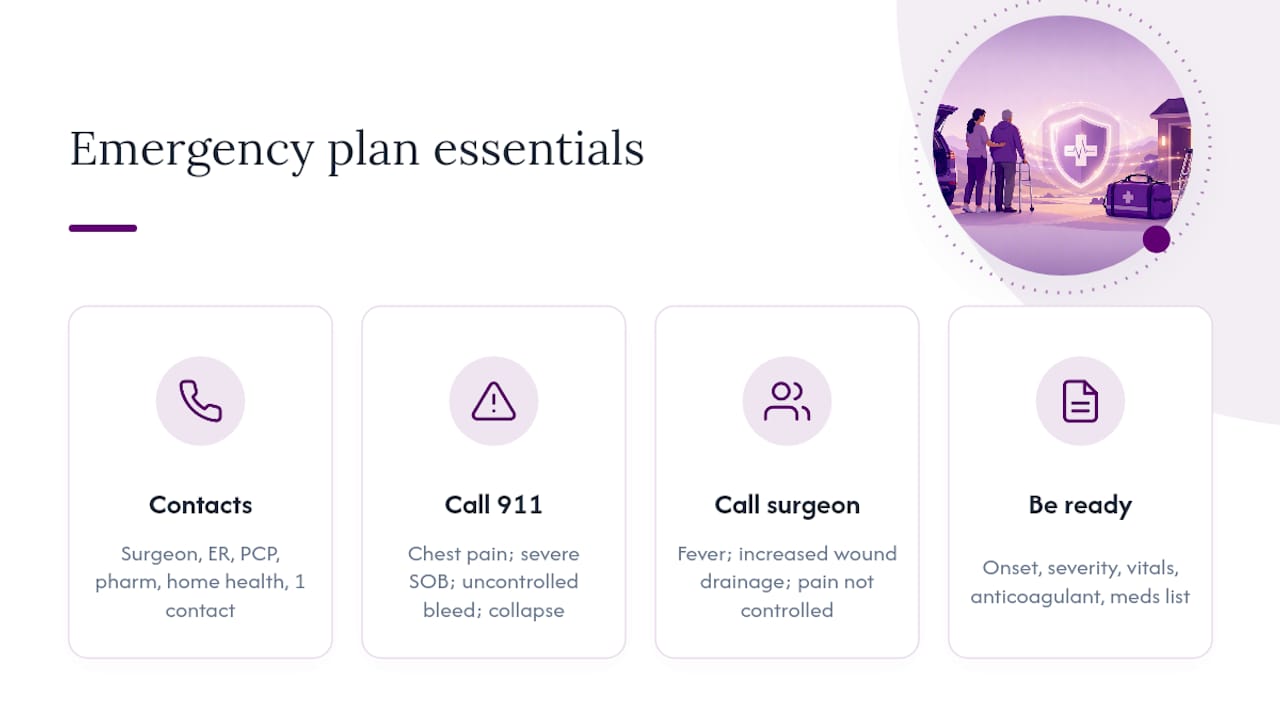
Keep a printed contact list on the fridge: surgeon’s office, nearest ER, primary care doctor, pharmacy, home health agency, and one emergency contact.
Call 911 immediately for: chest pain, severe shortness of breath, uncontrolled bleeding, or sudden collapse.
Call the surgeon’s office for: fever, increasing wound drainage, or pain that isn’t responding to the prescribed medication plan.
When you call either one, be ready to explain when symptoms started, how severe they are, any vital signs you’ve checked, and whether the patient recently took an anticoagulant. Having an informed advocate who knows the medication list and history speeds up every one of these calls.
You’re the Patient’s Coach, Not Just Their Assistant
Recovery is rarely a straight line. Some days the patient will hit a milestone; others they’ll feel stuck, and that’s normal, not a setback you caused. The caregiver’s real job is coaching: steady encouragement, sharp attention to warning signs, and logistics handled quietly in the background. Lean on the care team’s questions line and any community resources available. You don’t have to have every answer yourself.
Adaptive Clothing That Actually Makes Dressing Easier
Getting dressed after orthopedic surgery shouldn’t turn into a ten-minute wrestling match with a sleeve or pant leg. Fracture-club designs recovery wear specifically for this problem: pants and sweatshirts with side magnetic zippers and easy closures that slide over a cast or brace without forcing the patient to raise an arm overhead or bend a healing joint at an awkward angle.
[

](fracture-club.com)
For lower-limb surgery patients, the easy-on/off adaptive recovery pants cut dressing time and reduce strain on both patient and caregiver during transfers. Upper-limb patients often do better in the adaptive easy-on/off sweatshirt, which avoids pulling a sleeve over a brace or cast entirely. If you’re outfitting a loved one for a longer recovery or need multiple pieces for a caregiver support pack, reach out through Fracture-club’s inquiry services page to ask about custom or bulk orders.
Sources
Always confirm your surgeon’s specific instructions first; these sources offer general guidance only.
This article is general information, not a substitute for advice from a qualified doctor. Consult a qualified healthcare professional about your own circumstances before acting on anything here.
Recommended
Comments