
Bone Density Test Preparation Guide for 2026
- T. Armstrong

- 2 days ago
- 8 min read

A bone density test preparation guide is a set of clinical instructions that helps you get an accurate, interference-free DXA scan on the first attempt. DXA stands for dual-energy X-ray absorptiometry, the gold standard imaging method for measuring bone mineral density. The International Society for Clinical Densitometry confirms that consistent patient preparation directly affects result quality and the reliability of long-term comparisons. Getting this right matters. A single missed step, like taking a calcium supplement the morning of your scan, can distort your results and delay your diagnosis. This guide covers every step you need to take before, during, and after your BMD test.
What you need to know before your bone density test
Preparation for a DXA scan begins at least 24 hours before your appointment. The most critical rule: stop all calcium supplements for at least 24 hours before the test. This includes Tums, Rolaids, Pepcid, multivitamins, and any standalone vitamin D supplements. Calcium residue in your digestive system can scatter the X-ray signal and make your bones appear denser than they actually are.
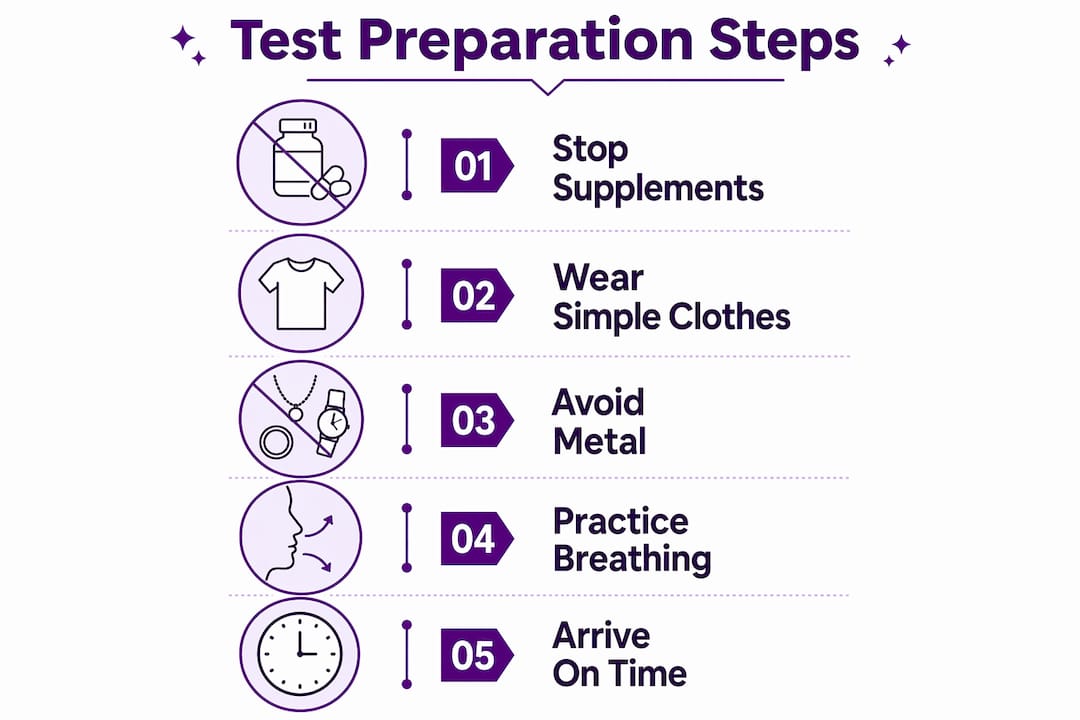
Here is a clear checklist of what to do and avoid before your scan:
Stop calcium supplements and multivitamins at least 24 hours before your appointment.
Avoid vitamin D supplements for the same 24-hour window, since many formulations include calcium.
Disclose all current medications to your provider, especially bisphosphonates like Fosamax, corticosteroids, or hormone therapy. These drugs affect bone metabolism and must be noted for accurate result interpretation.
Report any recent contrast imaging. If you have had a barium exam or nuclear medicine scan, avoid the DXA scan for at least 72 hours afterward. Residual contrast material can skew your bone density readings significantly.
Wear loose, metal-free clothing. Jeans with metal rivets, underwire bras, and belts with metal buckles all interfere with the scan. Choose soft pants, a cotton top, and a sports bra with no underwire.
Remove jewelry and metal accessories before you arrive, or plan to remove them at the clinic.
Eat and drink normally. No fasting is required before a DXA scan. You can have your regular meals and stay hydrated.
Pro Tip: Lay out your clothing the night before. A simple outfit without zippers, buttons, or underwire saves time at the clinic and removes one source of stress on test day.
Patients on long-term steroid therapy or those with a history of fractures may be scheduled for more frequent scans. Tell your provider about your full medication history so they can document it alongside your results.

How does a bone density test work?
A standard DXA scan takes 10–30 minutes and is completely painless. No injections, no sedation, and no enclosed spaces. You lie on a padded table while a mechanical arm passes slowly over your body. The machine sends two low-energy X-ray beams through your bones, and a detector on the other side measures how much energy passes through. Denser bones absorb more energy. The computer translates that data into a T-score and a Z-score.
Here is what happens step by step during the procedure:
You lie flat on the padded table. The technologist positions you with your legs straight or slightly elevated.
Foam blocks are placed under your knees. This flattens the lumbar spine against the table, which is necessary for an accurate measurement of the lower back vertebrae.
The scanning arm moves slowly over your body. You will hear a quiet mechanical hum. The arm does not touch you.
You stay completely still. Any movement during the scan can blur the image and require a retake, which extends your time in the room.
The technologist scans the hip next. Your foot is rotated inward and held in place with a positioning strap. This is standard practice, not a sign of a problem.
The scan ends and you are free to go. Results are typically available within 24 hours and sent to your ordering physician.
Radiation exposure from a DXA scan is minimal. The dose is far lower than a standard chest X-ray, making the test safe for routine use and repeat screenings.
Pro Tip: If you feel anxious about staying still, practice slow, steady breathing before your appointment. Controlled breathing keeps your body calm and reduces involuntary movement during the scan.
Your results will show a T-score, which compares your bone density to a healthy young adult, and a Z-score, which compares it to people your own age and sex. Both scores help your doctor assess fracture risk and decide whether treatment or lifestyle changes are needed. For a deeper look at what those numbers mean, the Fracture-club guide on reading bone health lab results walks you through the scoring system in plain language.
Common mistakes that can affect your results
Most preparation errors are simple and completely avoidable. Knowing them in advance is the best protection against a wasted appointment.
Taking calcium the morning of the scan. This is the single most common mistake. Even a single dose of a calcium-containing antacid can coat the gastrointestinal tract and artificially inflate your bone density reading.
Wearing clothing with hidden metal. Metal in underwire bras or shapewear forces the technologist to stop the scan and ask you to change into a gown. This adds time and can feel uncomfortable if you were not expecting it.
Forgetting to mention recent contrast imaging. Barium from a GI study or tracers from a nuclear medicine scan linger in your body. Scanning too soon after these procedures produces unreliable results.
Moving during the scan. Even small shifts, like adjusting your position or coughing repeatedly, can blur the image. The technologist will ask you to hold still, but knowing this in advance helps you prepare mentally.
Ignoring provider-specific instructions. Some facilities have additional requirements based on their equipment or your medical history. Always read the prep sheet your clinic sends you and call if anything is unclear.
“Preparation affects not just today’s result, but every comparison scan you have over the next decade.” This is why the International Society for Clinical Densitometry treats standardized preparation as a clinical requirement, not a suggestion.
Tips for a smooth bone density testing experience
A few practical steps before and after your appointment make the whole process easier.
Schedule your DXA scan on a day with no other imaging. If you need a barium swallow or contrast CT, book those for a different week. Contrast materials from other scans can interfere with your DXA results for up to 72 hours.
Bring a written list of your current medications and supplements. Include dosages and how long you have been taking each one. Your technologist and physician need this information to interpret your results correctly.
Arrive five minutes early. This gives you time to remove jewelry, change if needed, and complete any remaining paperwork without feeling rushed.
Communicate openly with your technologist. If you have had a recent hip replacement, spinal surgery, or a previous fracture, tell them before the scan begins. Metal implants and bone abnormalities affect which sites can be measured and how results are interpreted.
Ask when your results will be ready. Most facilities send results to your doctor within 24 hours. Knowing the timeline reduces the anxiety of waiting.
Follow up on your results. A DXA scan is most useful when it leads to a conversation with your doctor about bone health, diet, and activity. If your results show low bone density, the Fracture-club article on why prevention beats fracture treatment explains the next steps clearly.
Bone density testing is typically repeated every two years for most adults, with more frequent scans for those with fractures, steroid use, or a strong family history of osteoporosis. Keeping consistent preparation habits across every scan makes your longitudinal data far more reliable.
Key Takeaways
Proper preparation for a DXA scan is a clinical requirement that directly protects the accuracy of your bone density results and every comparison scan that follows.
Point | Details |
Stop supplements 24 hours before | Avoid calcium, vitamin D, and multivitamins for at least 24 hours to prevent result distortion. |
Wear metal-free clothing | Skip underwire bras, metal fasteners, and jewelry to avoid scan interference and delays. |
Disclose contrast imaging history | Inform your provider of any barium or nuclear medicine scans within the past 72 hours. |
Stay still during the scan | Any movement can blur the image and require a retake, extending your time in the room. |
Follow up on your results | Use your T-score and Z-score as a starting point for a conversation about bone health with your doctor. |
What I have learned from watching people walk into this test unprepared
Most people treat a bone density test like a routine blood draw. They assume showing up is enough. It is not. The DXA scan is a precision measurement. Small variables, a calcium tablet, a metal zipper, a barium study from three days ago, can shift your T-score enough to change a clinical decision. That is not a minor inconvenience. That is a misdiagnosis or a missed diagnosis.
What I find most reassuring to share is this: the preparation is genuinely simple. You do not need to fast, you do not need to stop eating dairy, and the scan itself is painless and fast. The steps that matter are specific and easy to follow once you know them. The problem is that most people receive a one-page prep sheet and assume the instructions are optional suggestions. They are not.
The patients who get the most value from their DXA scans are the ones who treat preparation as part of the test itself. They show up in soft, metal-free clothing. They stopped their supplements the day before. They brought a medication list. They told the technologist about their hip replacement before the arm started moving. Those patients get clean data. Clean data leads to better care.
If you are heading into your first scan, or your fifth, take the prep seriously. Your bone health over the next decade depends on the accuracy of the data you generate today.
— Fracture
Recovery wear that works as hard as you do
Bone health does not stop at the scan. For those managing a fracture or recovering from a bone-related procedure, getting dressed each day can feel like its own challenge.

Fracture-club designs adaptive recovery clothing built for exactly this moment. The adaptive recovery pants feature side magnetic zippers that let you dress and undress without bending, pulling, or asking for help. The easy-on recovery sweatshirt is designed for upper limb injuries, so getting dressed does not require a full range of motion. A portion of every purchase supports the Bone Health and Osteoporosis Foundation. Comfort and purpose, in one piece of clothing.
FAQ
What should I avoid eating before a bone density test?
No fasting is required before a DXA scan. You can eat and drink normally, but avoid calcium supplements, antacids containing calcium, and vitamin D supplements for at least 24 hours before your appointment.
How long does a bone density test take?
A standard DXA scan takes 10–30 minutes and is painless, with no sedation or injections required.
Can I wear my regular clothes to a DXA scan?
You can, as long as your clothing has no metal. Underwire bras, metal zippers, and belts with metal buckles interfere with the scan and may require you to change into a gown.
How often should I get a bone density test?
Most adults repeat the test every two years. Patients with fractures, long-term steroid use, or a family history of osteoporosis may need more frequent scans.
When will I get my bone density test results?
Results are typically available within 24 hours and sent directly to your ordering physician, who will review your T-score and Z-score with you.
Recommended
Comments